Bare spots or a patchy lawn can make even the most cared-for yard look tired and neglected. Whether bare spots are from foot traffic, pests, drought stress, or winter damage, the good news is they’re fixable and with a little effort, you can blend repair areas seamlessly into the rest of your turf. Here’s the step-by-step process we recommend for Minnesota and Wisconsin lawns.
1. Control Weeds First
Before repairing, you need a clean slate. Weeds compete with grass seed for sunlight, water, and nutrients and they often win.
- Pull or spot-treat weeds in the bare areas before seeding.
- If you use a weed control, most products recommend waiting a couple of weeks before seeding.
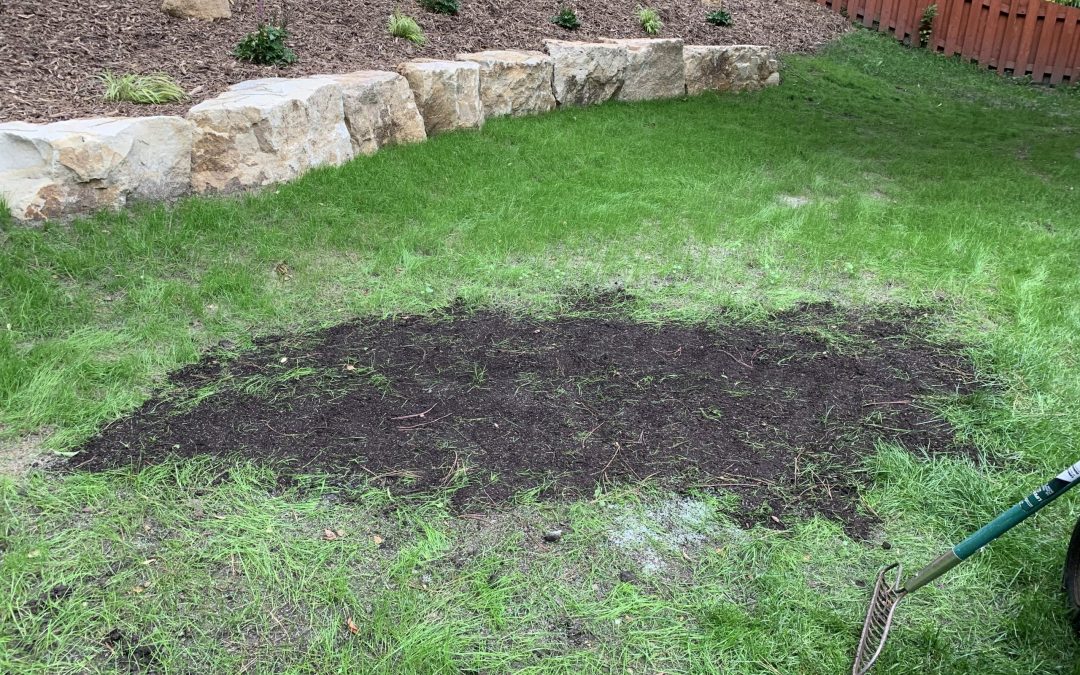
2. Rough Up the Soil
Once the weeds are gone, it’s time to prep the surface.
- Clean up any dead grass or plant material by raking the area.
- Use a hand rake or garden weasel to loosen the top 1–2 inches of soil.
- Remove rocks, thatch, or compacted debris so new roots can grow down easily.
- If the soil is hard, consider a light topdressing with compost for better seed-to-soil contact.
3. Seed the Area
Pick a grass seed blend that matches your existing lawn type and is well-suited for our region’s climate. For Minnesota and Wisconsin, cool-season grasses like Kentucky bluegrass, fine fescue, and perennial ryegrass are ideal. If you want advice on selecting a grass seed, read our blog.
- Evenly sprinkle the seed over the prepared area.
4. Lightly Rake It In
After seeding, use a leaf rake turned upside-down or a garden rake with a gentle touch to lightly mix the seed into the top ¼ inch of soil.
- Improves germination rates – Mixing seed into the top layer of soil ensures seed to soil contact, which boosts the percentage of seeds that sprout.
- Protects seeds from birds and rain – Lightly covering seeds helps prevent them from being eaten or washed away.
- Keeps seeds moist longer – A thin layer of soil helps retain moisture around the seed, preventing it from drying out too quickly.
- Optimizes light exposure – Keeps most of the seed near the surface for the sunlight it needs.
5. Timing Is Key
In our region, the best time to repair bare spots is early fall, followed by spring as a second choice.
- Fall repairs benefit from cooler air temperatures, but warm soil temperatures, more consistent rainfall, and reduced weed competition.
- Spring repairs can work well, but be prepared for more frequent watering and possible summer heat stress. Competition from weeds however is at its highest.
- Summer repairs are more difficult due to disease and heat, but can work with regular monitoring and watering.
6. Keep It Watered & Protect the Area
Water is the make-or-break step in lawn repair.
- Keep the topsoil consistently moist until the seedlings are 2–3 inches tall. This often means light watering multiple times per day.
- Avoid puddling or runoff.
- Minimize foot traffic on the area to prevent seed disturbance and soil compaction.
Patience Pays Off
With consistent care, you should see germination in 5–21 days depending on the grass variety. Avoid mowing the repair areas until the new grass is at least 3 inches tall and has been cut once or twice. By next season, your patchy spots should blend right in.